This post may contain affiliate links, to learn more about them, check out our Disclosure.
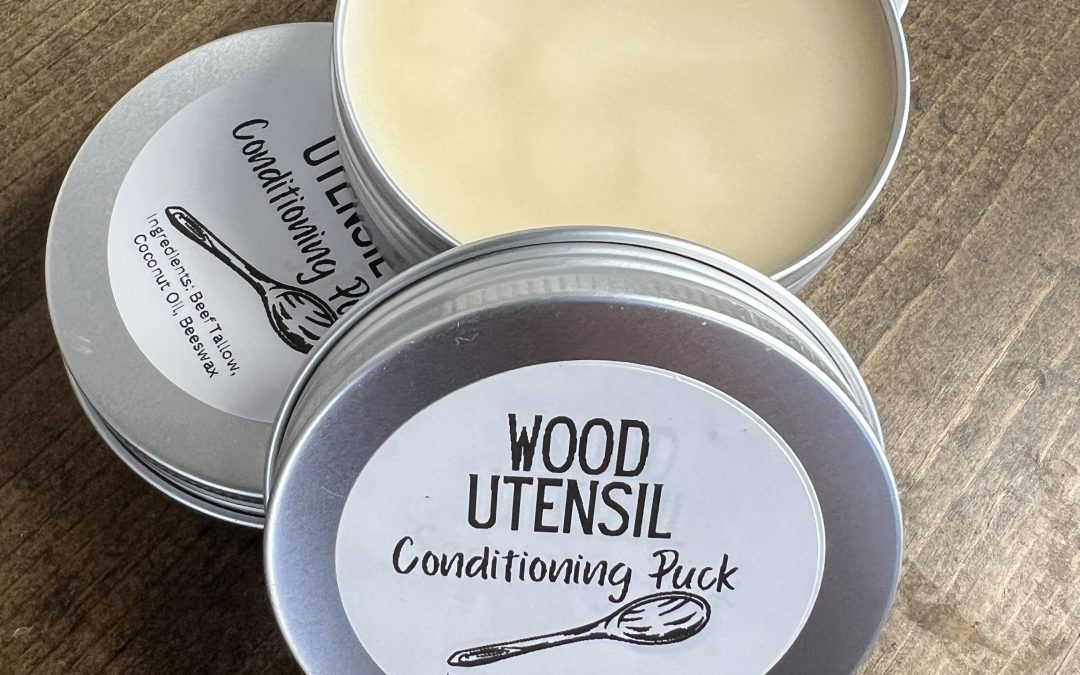
Looking to restore and protect your wooden kitchen utensils naturally? This DIY wood conditioner recipe, featuring nourishing ingredients like tallow and beeswax, will help extend the life of your wooden spoons, spatulas, and cutting boards. With just a few simple steps, you can create a food-safe conditioner that leaves wood polished, water-resistant, and beautiful for years to come. Keep reading to learn how to make and apply this effective wood conditioner at home!
DIY Tallow Wood Conditioner Recipe
Ingredients
- Beef Tallow – 2 parts
- Beeswax – 1 part
- Coconut Oil – 1 part
Instructions
- In a double boiler, melt the beef tallow, beeswax, and coconut oil together until fully liquefied.
- Remove from heat and stir in a few drops of vitamin E oil if desired.
- Pour the mixture into a clean container and let it cool completely before using.
- To apply, rub a small amount of the conditioner onto the wood surface with a cloth, let it sit for a few hours or overnight, and then buff off any excess.
Benefits of Each Ingredient
- Beef Tallow: High in natural fats, tallow is deeply nourishing and helps create a water-resistant barrier on wood, preventing drying, cracking, and warping. It’s also safe for food-contact surfaces.
- Beeswax: Provides a firm, protective layer on wood, sealing in moisture and giving a subtle shine. It also has antibacterial properties, helping keep the wood hygienic.
- Coconut Oil: Lightweight and penetrates wood fibers well, keeping the wood supple and less prone to drying out. It has a longer shelf life than some oils, preventing the conditioner from becoming rancid quickly.
- Vitamin E Oil (Optional): Acts as a natural preservative to extend the shelf life of the conditioner and adds a bit of extra antioxidant protection.
This conditioner will keep wooden utensils looking polished and will extend their lifespan by maintaining the wood’s natural integrity.
If you’d like to try a natural alternative to tallow in the wood conditioner, here are a few options:
- Coconut Oil (unrefined): Works well as a wood conditioner due to its penetrating properties and resistance to rancidity. It’s lightweight, easy to apply, and helps prevent wood from drying out.
- Walnut Oil: A drying oil that hardens slightly upon curing, offering a natural finish that conditions and protects wood. It has a mild scent and adds a smooth texture to the wood surface. It also doesn’t go rancid quickly.
- Olive Oil: A more common kitchen oil that is food-safe and easily available, though it may not have as long a shelf life as other options. It can work well in a pinch but may need reapplication more frequently.
- Jojoba Oil: A wax-like oil that’s excellent for conditioning wood and resists going rancid. It deeply penetrates wood fibers, creating a water-resistant finish without being greasy. Jojoba is more expensive but has a long shelf life and is easy to apply.
- Flaxseed Oil (Linseed Oil): A traditional choice for wood finishing, this oil polymerizes (hardens) over time, forming a durable layer that protects wood from moisture. Use food-grade flaxseed oil for kitchen tools to ensure it’s safe for food-contact surfaces.
Each of these oils can replace the tallow in the conditioner recipe, combined with beeswax for a balanced texture and added protection. Just take note that if you are using an oil, you may need to increase your ratio for the bees wax.

Applying a wood conditioner like this to your wooden utensils is easy and only takes a few simple steps. Here’s a guide to help you get the best results:
How to Apply Wood Conditioner to Wooden Utensils
- Clean the Utensils:
- Wash your wooden utensils with warm water and mild soap to remove any food residue or oils.
- Rinse thoroughly and allow them to dry completely. It’s essential that the wood is fully dry before applying the conditioner.
- Warm the Conditioner (Optional):
- If your conditioner has hardened, you can soften a small amount by warming it gently over a double boiler or rubbing it between your fingers. This step can make it easier to apply, especially in cooler temperatures.
- Apply the Conditioner:
- Scoop a small amount of the conditioner onto a clean, lint-free cloth or paper towel.
- Rub the conditioner into the wood in circular motions, ensuring all areas are covered. Pay special attention to any rough or dry spots, as these may need more conditioning.
- Let it Sit:
- Allow the conditioner to sit on the wood for a few hours or, ideally, overnight. This gives the wood fibers time to absorb the oils and wax.
- Buff and Polish:
- After the conditioning time, use a clean, dry cloth to buff the wood, removing any excess conditioner. This will leave a smooth, non-greasy finish.
- Repeat as Needed:
- For very dry or older utensils, you may need to repeat the conditioning process a few times to fully restore them.
- For maintenance, apply the conditioner every month or so, or whenever the wood looks dry.
This process will help your wooden utensils remain smooth, resistant to water, and less likely to crack over time. It also helps maintain the natural grain and beauty of the wood.


